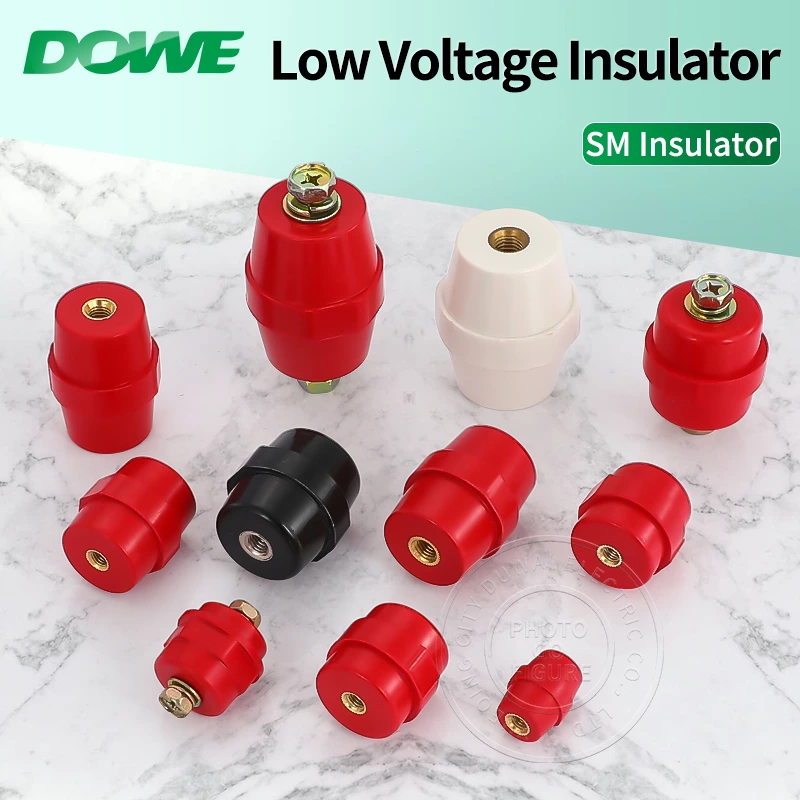
How to Ensure the Busbar Insulator Sizes Are Correct for Your Equipment?
Choosing the wrong busbar insulator size can cause equipment failure ⚠️. The right size ensures safety, performance, and durability.
Measure the busbar width, thickness, and mounting space to select the correct insulator size. Use technical drawings for accuracy.
I once had a client whose equipment overheated due to a mismatched insulator. After switching to the correct size, their system ran smoothly, proving how critical sizing is.
[Table of contents]
- Why Does the Right Busbar Insulator Size Matter?
- How Do You Measure for the Correct Insulator Size?
- What Common Mistakes Should You Avoid When Choosing Insulator Sizes?
- Conclusion
Why Does the Right Busbar Insulator Size Matter?
Using the wrong insulator size can lead to electrical failures and safety risks. Proper sizing ensures stable support and insulation.
Correct busbar insulator sizing prevents short circuits, overheating, and mechanical instability, ensuring equipment reliability. Learn more1
Dive Deeper: Benefits of Correct Insulator Sizing
- Safety: Prevents electrical arcs and shocks ⚡.
- Performance: Maintains electrical efficiency and reduces power loss.
- Durability: Extends the lifespan of both insulators and busbars.
| Benefit | Result |
|---|---|
| Prevents overheating | Protects equipment from damage |
| Ensures secure connections | Reduces maintenance and downtime |
| Meets certification standards | Ensures compliance with safety codes |
How Do You Measure for the Correct Insulator Size?
Accurate measurements are key to selecting the right insulator. Use calipers or rulers for precise results.
Measure the busbar width, thickness, and mounting distance. Ensure the insulator height and hole diameter match your setup.
Dive Deeper: Step-by-Step Measurement Guide
-
Measure Busbar Dimensions:
- Width: Measure the busbar’s horizontal dimension.
- Thickness: Measure its vertical thickness.
-
Check Mounting Space:
- Distance: Measure the space between mounting points.
- Height: Ensure the insulator’s height aligns with clearance needs.
-
Match Hole Sizes:
- Hole Diameter: Ensure the insulator’s hole fits your mounting bolts.
| Measurement | Tool Needed | Importance |
|---|---|---|
| Busbar Width | Calipers or ruler | Ensures proper fit inside the insulator |
| Thickness | Calipers | Ensures correct support and insulation |
| Mounting Distance | Measuring tape | Maintains structural stability |
What Common Mistakes Should You Avoid When Choosing Insulator Sizes?
Even small sizing errors can lead to big problems. Avoid these common mistakes to ensure a perfect fit.
Ignoring busbar thickness, using insulators with incorrect hole diameters, or neglecting mounting distances can cause electrical failures.
Dive Deeper: Common Mistakes and How to Avoid Them
- Misjudging Thickness: Ensure the insulator slot is slightly wider than the busbar for easy installation.
- Overlooking Mounting Distance: Too much or too little spacing can weaken support.
- Wrong Hole Diameter: Use insulators with holes that match bolt sizes to prevent loose connections.
- Ignoring Certifications: Choose products compliant with international safety standards.
| Mistake | Consequence | Solution |
|---|---|---|
| Using an insulator too small | Overheating and equipment damage | Choose insulators with correct width |
| Incorrect bolt hole size | Loose or unstable connections | Measure bolt diameter accurately |
| Neglecting mounting distance | Structural instability | Double-check measurements |
| Ignoring certifications | Safety and compliance issues | Verify certifications before buying |
Conclusion
Choosing the correct busbar insulator size ensures safety, efficiency, and long-lasting performance. Always measure carefully and double-check specifications.
-
Click this link to learn about common busbar insulator sizes, measurement methods, and industry guidelines. This helps you select the right insulator and avoid sizing errors. ↩